Best E-commerce + website photography strategies by e-commerce website photographer Kate Benson
How does website e-commerce photography affect your SEO?
Search engine optimization (SEO) should be on your mind in everything while building your website. Often times people overlook that your e-commerce and website photography is an opportunity to increase the SEO on your site. From website photographer Kate Benson: “I offer to give the pictures I take custom image names and keywords so they show up in Google (and other search engine) image searches which not only increases the SEO on the customers website, but also let’s buyers who use image searches to shop find the product faster”.
To utilize this opportunity for SEO, selecting the right website building platform is critical. “Make sure you select to build your website on a platform that doesn’t rename your image files, that way those custom image names are used”. Squarespace for example has been known to rename images when they are resized to fit into the templates. So although the websites are beautiful, it might not be the best choice if you want to utilize this aspect of SEO. Kate is a big advocate for using WordPress themes with plugins that are really flexible so you can design them to look like anything you want. “My favorite WordPress theme is Divi by Elegant Themes. I’ve been recommending clients to it because it lets you have control over all the design elements, it is responsive, and has lots of opportunities for SEO in images. Google (my search engine of choice) reads these websites really well.”
Creating customer trust through consistency in your website photography.
Forbes.com recommends looking at your website as a user. They shared this quote:
Users see what owners don’t. A way to shed light to owners is to cut through the noise and give the users three firm things clearly and efficiently: What your service or product does, examples of what you do, and why they should trust your brand. Presenting content that follows the form after function rule will yield the best impact. Don’t underestimate the power of visual design as a differentiator. – Lee Salisbury, UnitOneNine
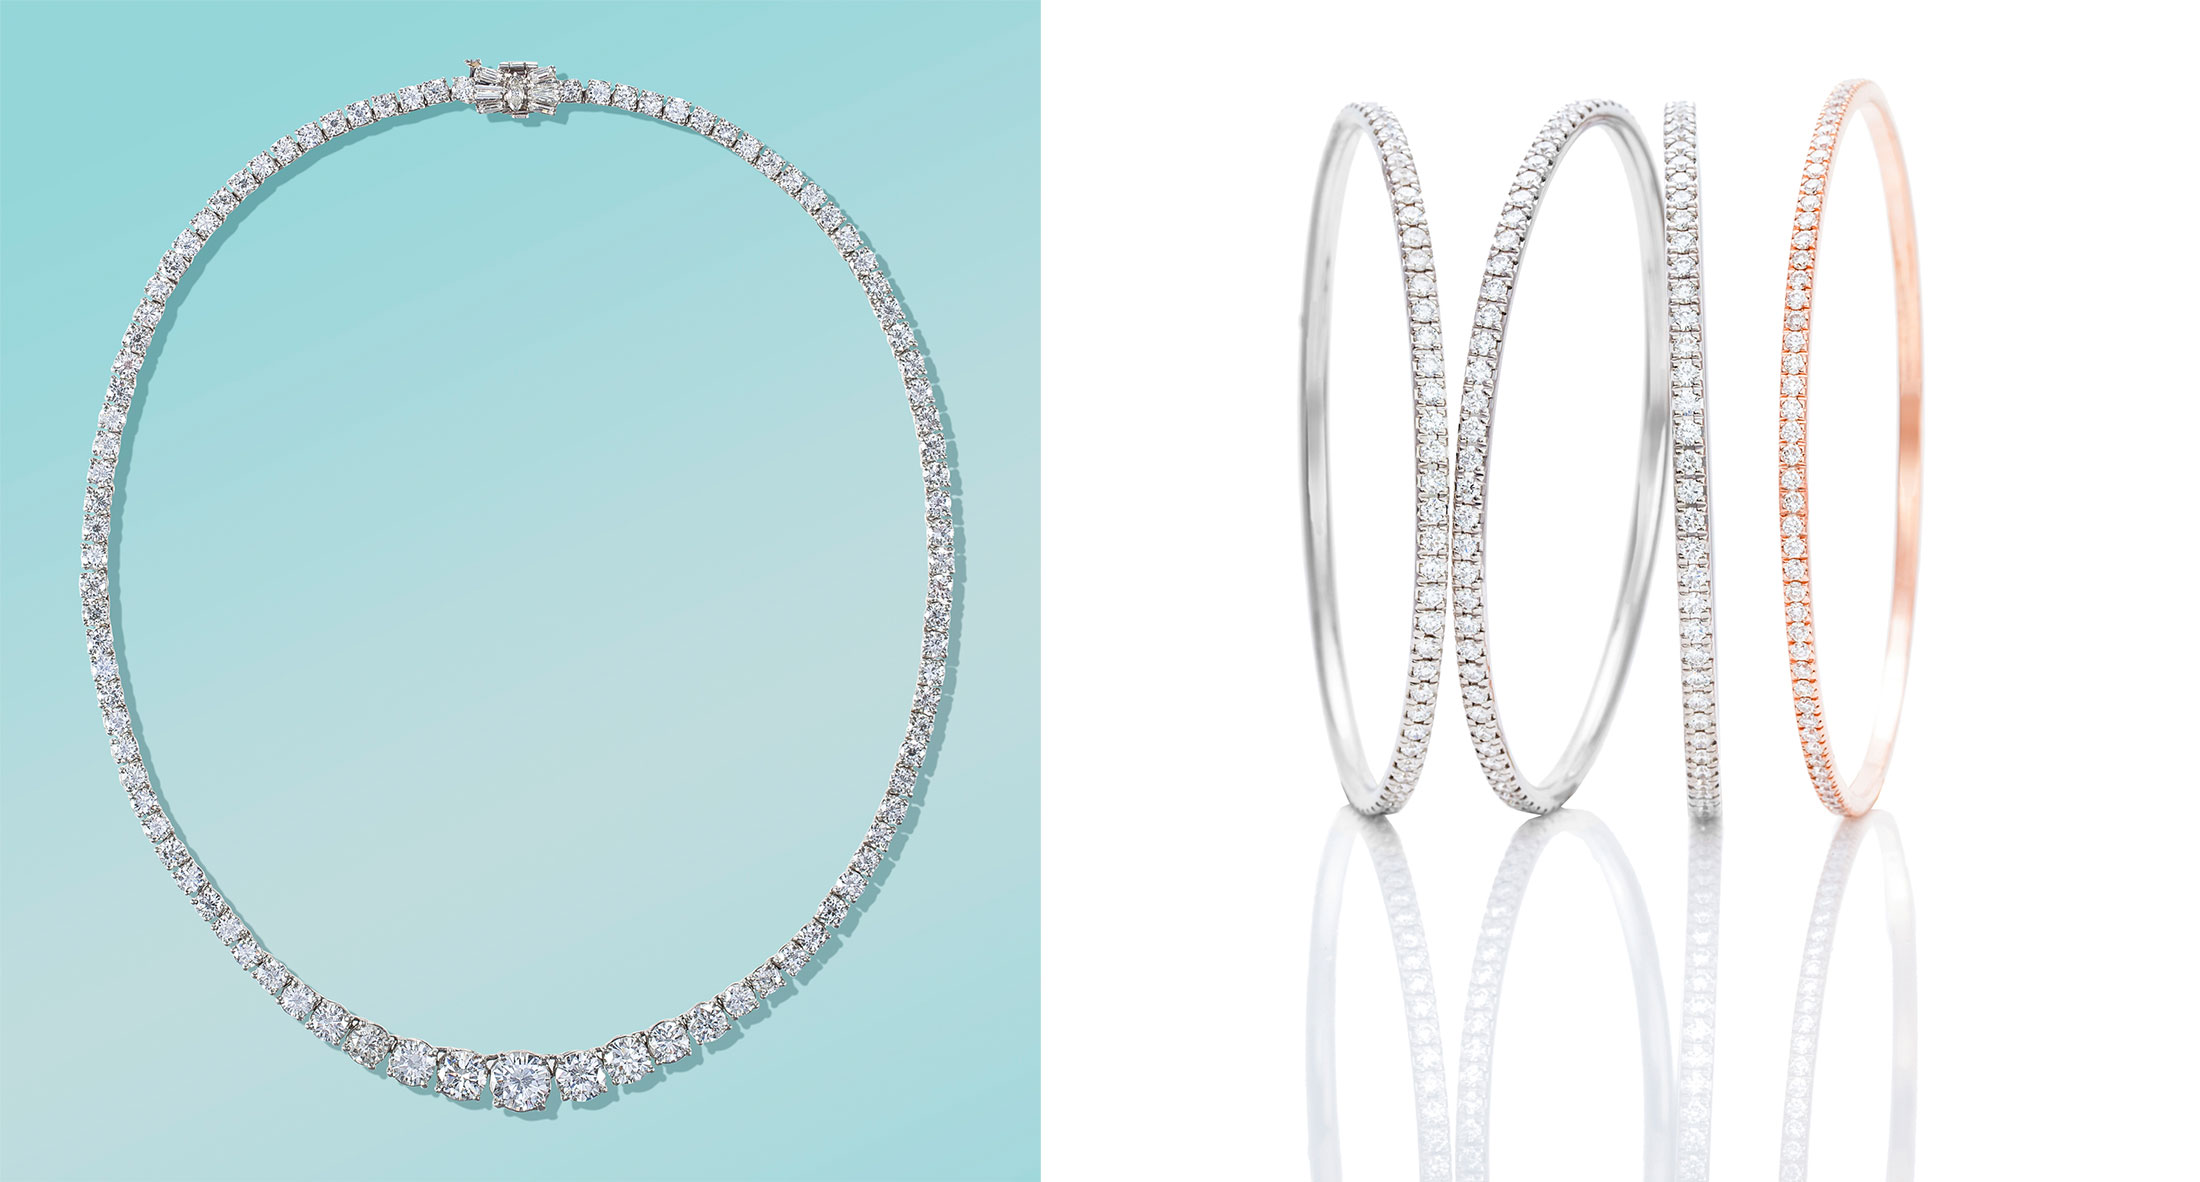
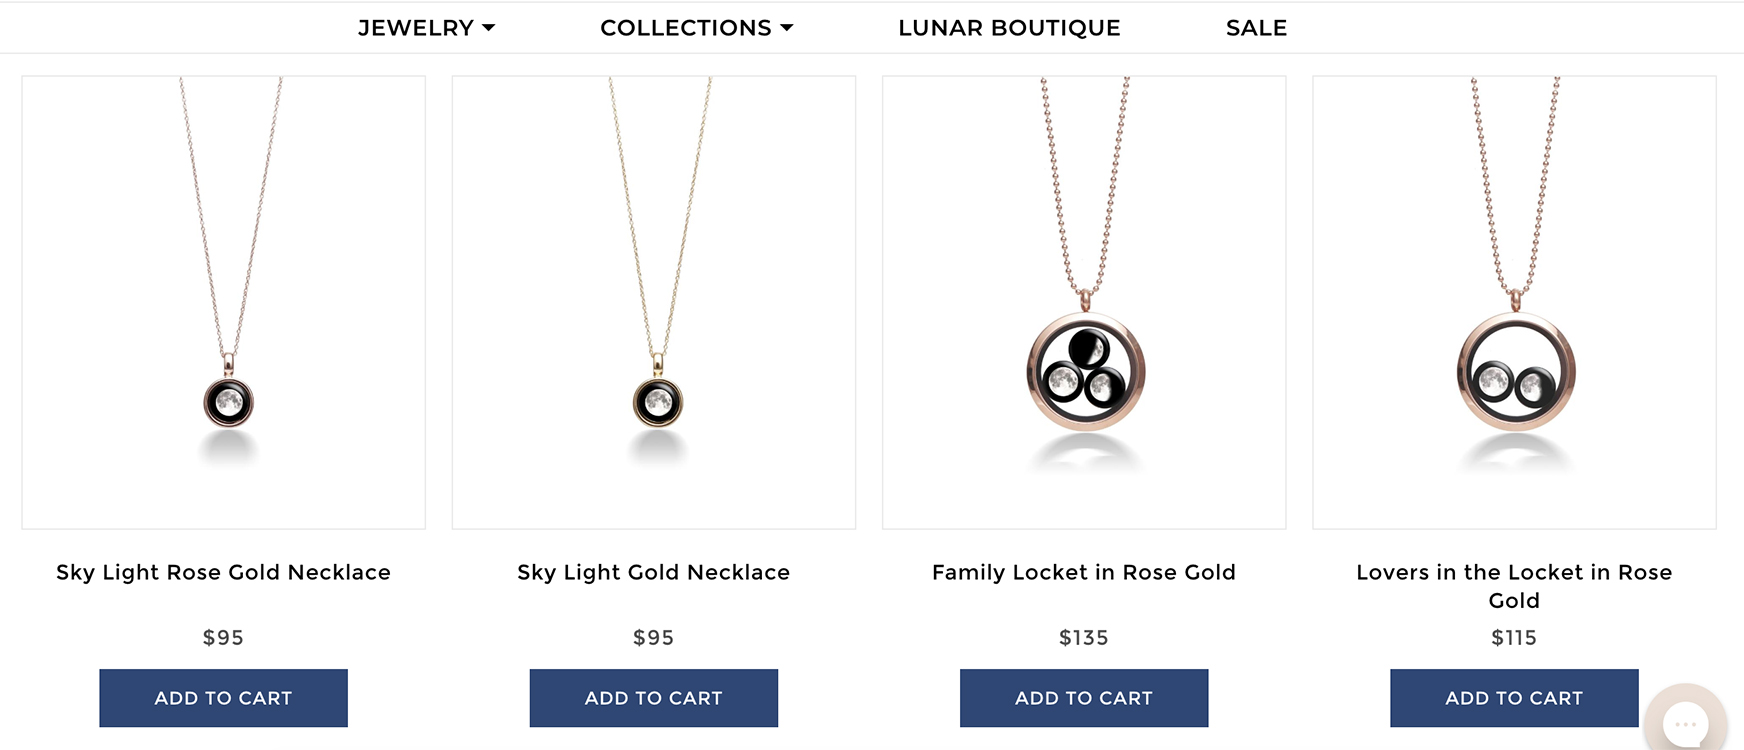
If your photography is all over the place and inconsistent, it can create distrust for a buyer. Photography that feels like it goes together and flows from image to image but still clearly tells the buyer about the product is the goal for good website photography. This doesn’t mean every picture must match, although many websites do prefer that formula, but they need to make sense together and all be on brand.
E-commerce website photographer Kate Benson describes this more. “I’ve had clients want everything from white background shots that are almost CGI (computer generate imagery) to every photo different in a new location on a model in environments. I’ve seen that both can work as long as you know your target market. Choosing the wrong type of e-commerce photography directly results in loss of sales. That is the last thing clients who work very hard getting customers to their websites need. The photography is the make or break when it comes to selling products online. Doing it with consistency (knowing what your lighting, compositions, crops and angles will be) over and over regardless of when the product was manufactured and the photoshoot is builds buyer trust and creates repeat customers. Once I get art direction locked in from a client, I record everything, how high was the tripod, how many lights, what modifiers, how far were they from the product, etc. That way the next time we work together the images can look like they were taken at the same time as the last shoot.”
Should you hire an e-commerce website photographer?
Hiring a professional e-commerce + website photographer can be a huge advantage if you hire the right one. It’s important that there is a good relationship between you and the photographer. You need to be able to trust them to take images you need, but a really good website photographer has other advantages they bring to the table.
“Finding an e-commerce + website photographer who you like is a great accomplishment and can be well worth the investment. A lot of my clients love that I shoot still life, e-commerce and fashion + lifestyle images because whatever they need, I can shoot it for them. Using one photographer can create consistency across websites, social media and all image branding channels and you have the benefit of working with someone you know and trust. Clients who work with me are looking for anything from total image branding to just some extra help when their in house photography teams are overwhelmed. My goal is always to give a client the best images possible and by that, I mean images that sell!” – e-commerce and website photographer Kate Benson.
Getting a great picture is just a small part of what a professional e-commerce and website photographer will do. Find the right person and ideally you’ll get a consultant in there who will work with you to make sure you get images that are consistent, on brand, are clear to the buyer, are accurate to the product (color/shape/etc), are sized in a way to keep your website running fast, and can even increase your SEO. Website photographer Kate Benson explains her process, “It’s not unusual for me to sit down with a client or a client’s website designer before or after I shoot and make sure we are getting all the images on the site correctly and optimized.”
It is very possible to take your own website photography. For people who are interested in learning photography and have the time to dedicate to it, it will save you money. Also people who already know photography can benefit from it. There are articles all over the web that will teach you how to do website photography, and in the right hand, these can be great. Just keep in mind your goals: if you have no real interest, time, or talent for photography, this might not be the place to conserve budget. A great photo of your product will sell more than an okay image. This is also something to consider when looking to hire a student or influencer to create your images. When hiring a professional website photographer, you are paying for someone to meticulously style your product in a set to make it look its best.
How do I find an e-commerce website photographer?
Finding a website photographer doesn’t have to be hard, but doing a bit of work in the beginning can be worth it. Especially if you plan on developing an ongoing relationship with a product photographer as your business and needs grow. A few questions that can get you started with your search for a website photographer are:
- Can I mail my product to a photographer?
- What is my budget for my photos?
- When will my products be ready to be shot?
If your product can be mailed, you are able to search a much larger radius to find your photographer and that opens doors for you. Essentially, anywhere in the world is a possibility, but if you can’t ship your product to a photographer or the shipping costs are prohibitively expensive, you need to search for a local photographer to your area. Since the range of what a photographer charges is infinite, your budget is going to narrow down who you can afford to hire. Lastly, when do you need the photos? A lot of photographers book up in advance so you need to make sure the photographer you choose is available when you need them.
How do you get a quote from an e-commerce website photographer?
After you’ve found an e-commerce website photographer you like, you will need to share with them your vision (or tell them that you need assistance building art direction) for the photographs of your product. Most e-commerce website photographers charge based off time + costs (usage is usually known) and so to build a quote the photographer will need you to share a shot list. WooCommerce explains a shot list as follows:
- Which products are in the shot.
- How many pictures of each product (front, front and back, etc).
- What type of shot it is (e.g., styled, on white, on coffee table, folded or laid out, etc.).
- Camera angle.
- Important style or setting actions (e.g., overhead light on / off).
- Important objects and props to include.
For example, one shot entry on your list could say something like: Sequined Cotton T-Shirt | Front and Back | Closeup | Half Body Mannequin | Style with red jeans and long gold chain with cat charm.
When adding to existing website photography, creating a shot list is easier because the type of shot, camera angle, style + setting actions are all already known. Then a shot list just needs to be which products, how many angles, what important props/objects need to be included.
“For clients that already have a website and want to just get help shooting, their current photography can act as a guide. When a client is doing a rebranding or starting up their business, I offer test shoots or to freelance art direct for them if they need some help.” -Kate Benson
Special requirements are a large determining factor in costs. Website and product photographer Kate Benson said “I often leave those off the initial quote. I find that making sure we can cover the base costs (time + team) is the first step. Then depending on the art direction I’ll either send an updated estimate with those costs or refer a set + prop stylist to come on board to help with that. If we do some test shooting or the shot list is really clear and a product I’m familiar with I’ll give a per shot rate to the clients.” Other special requirements could be studio and location rentals or special equipment rentals or rush fees.
How do you know if you’ve found the right website e-commerce photographer?
After you’ve done the work above you may have a list of photographers whose work you love, are in your budget, and available when you need them. That is a great situation! Website e-commerce photography is a big commitment though as changing the way things look down the road may require reshooting everything that you are still selling but have an older photograph for. Talking to the photographer either on the phone or in person is a great first step to feeling out if they connect with you and understand what you need.
E-commerce website photographer Kate Benson has insight on how she builds confidence with her clients about working together. “I offer test shoots. A test shoot is when the client sends me one of each type of product they have and we do a virtual live shoot. After each shot reaches a place I am happy with it, I’ll send them the shot via text or email for their thoughts. This lets the client see exactly what the images will look like when they get them from me. If the client has been struggling to put together art direction, we use a test shoot to explore different angles, lighting and options to find what works best for their product.”
Closing thoughts
Building and maintaining a website is a lot of work. But doing it right has large payoffs and can get you into the statistics of the successful online stores. Hopefully this has taken some of the mystery out of the world of e-commerce website photography.
If you need an e-commerce website photographer and would like more information, or a free quote on your project, feel free to contact Kate Benson Photography.
Good luck with your website!
305-982-7761 | [email protected]
Additional Resources:
Ecommerce Branding: 11 Examples and 27 Expert Tips to Help Build Your Brand Online